Onboarding Steps and Best Practices
How To Create A Dashboard In Downstream
How to Navigate to Dashboards
From the left-hand navigation panel, select Dashboards.

How to Create a New Dashboard
There are two ways you can create a new dashboard.
Creating a new dashboard from scratch.
Cloning from an existing dashboard.
Create a New Dashboard from Scratch
To create a new dashboard from scratch:
Click on + Add New Dashboard.

A pop-up window will appear asking you to name your dashboard and give a description of the dashboard (optional).

Click Add Dashboard.
Cloning from an Existing Dashboard
To clone an existing dashboard:
Click into the existing dashboard you wish to clone.
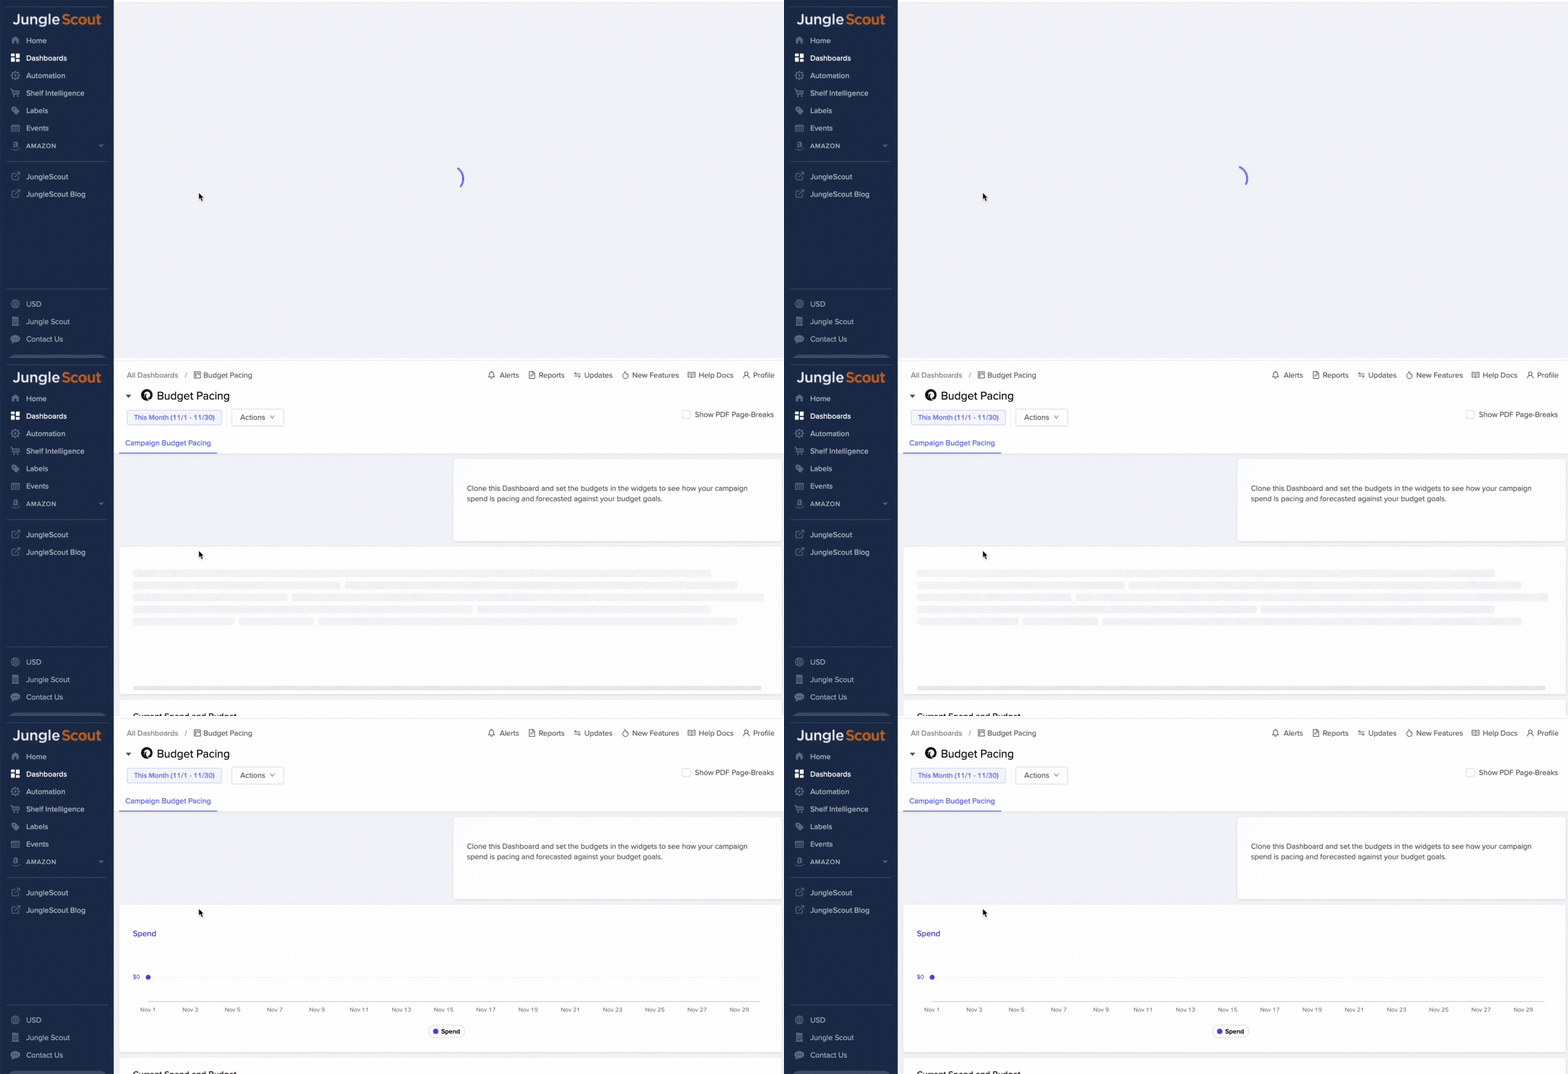
Click on the Actions drop-down menu.
Then, click Clone Dashboard.

A pop-up window will appear asking you to give your dashboard a new name and a description (optional).

Click Submit.
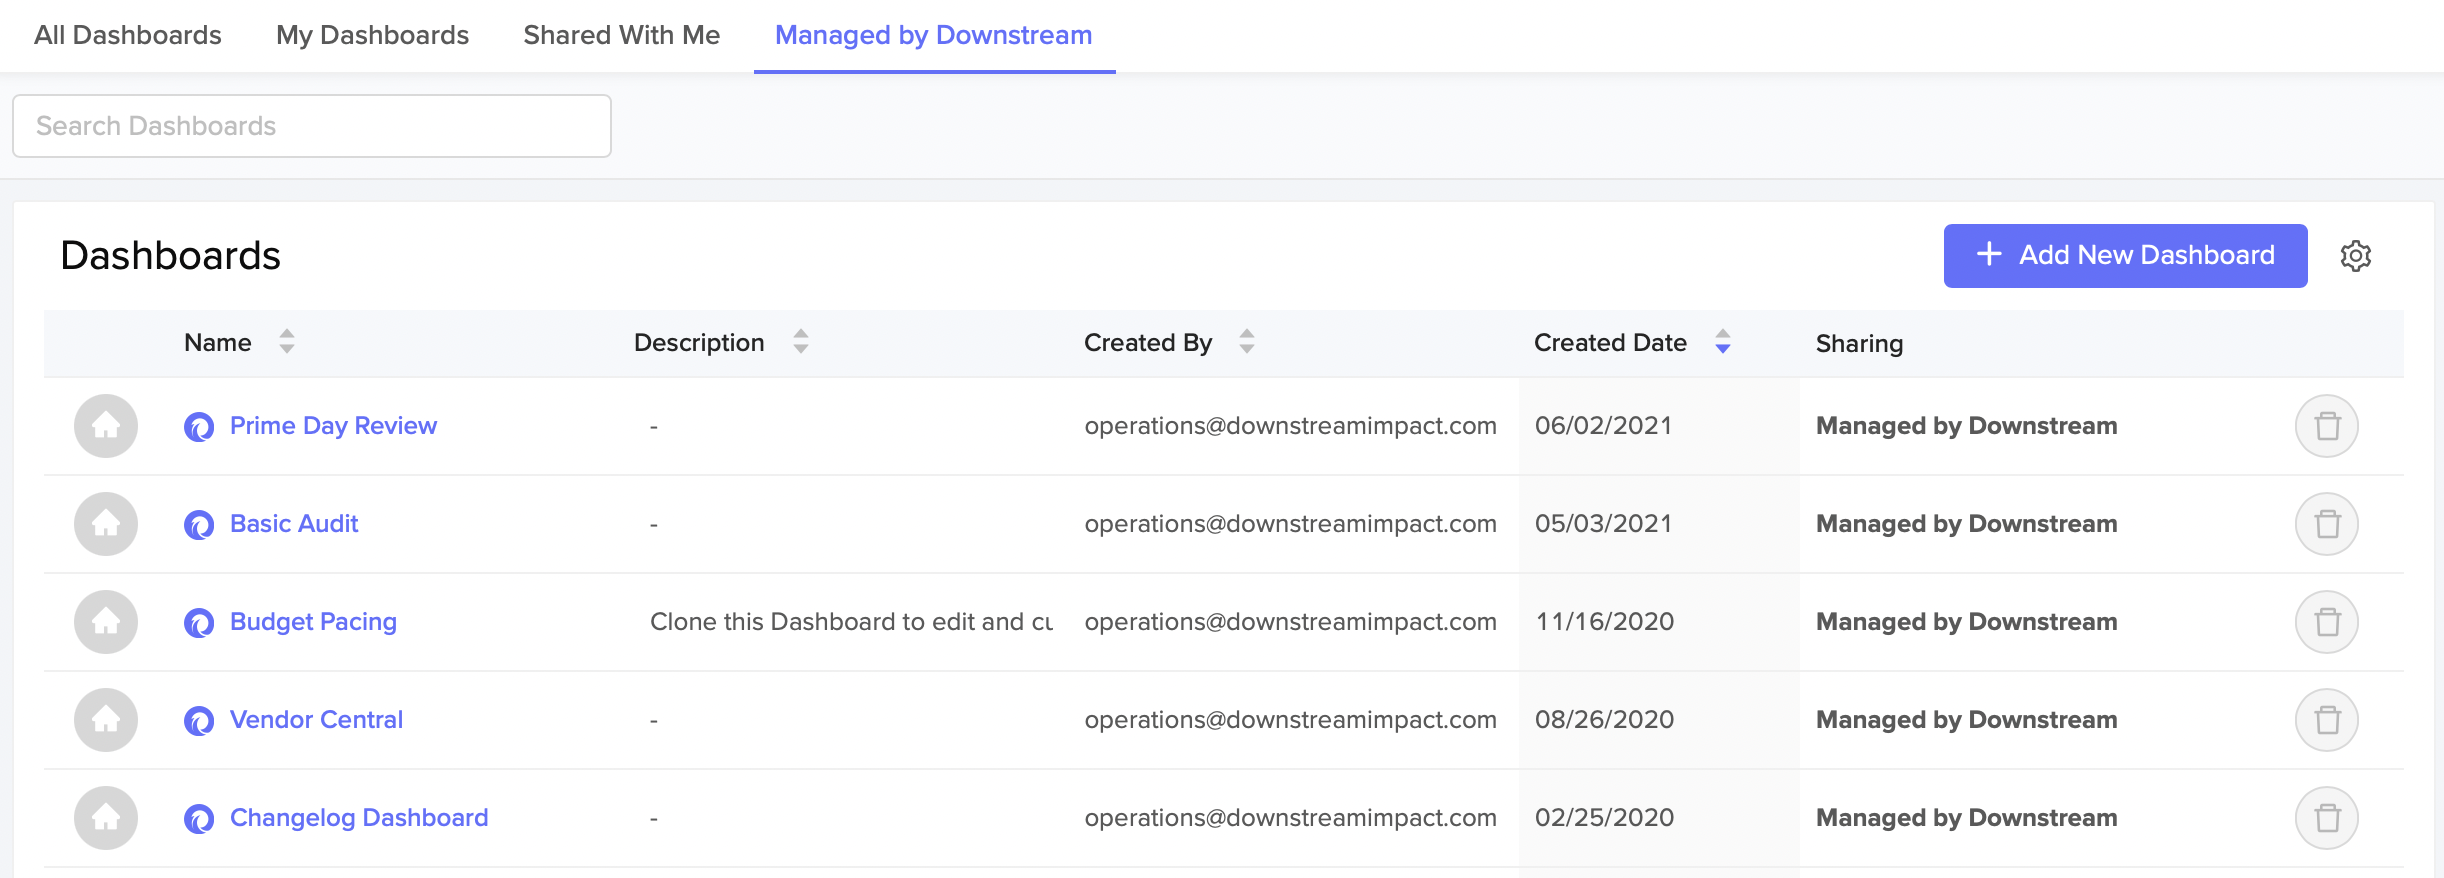
NOTE: Downstream has created several template dashboards for you to reference. You cannot edit these dashboards, but you can clone them. You can find them by going into the Managed by Downstream dashboards at the top of the page. Each Managed by Downstream dashboard has the Downstream logo next to the name.
Creating A Widget
Once you have created or cloned a dashboard you will have the option to add widgets to your new dashboard. Widgets are how you wish to view your data. There are five different widgets that you can choose from.
Adding Widgets in a New Dashboard
Once you have created a dashboard, you will be brought to your created dashboard and notice there are no widgets yet added.
To add a widget to your dashboard:
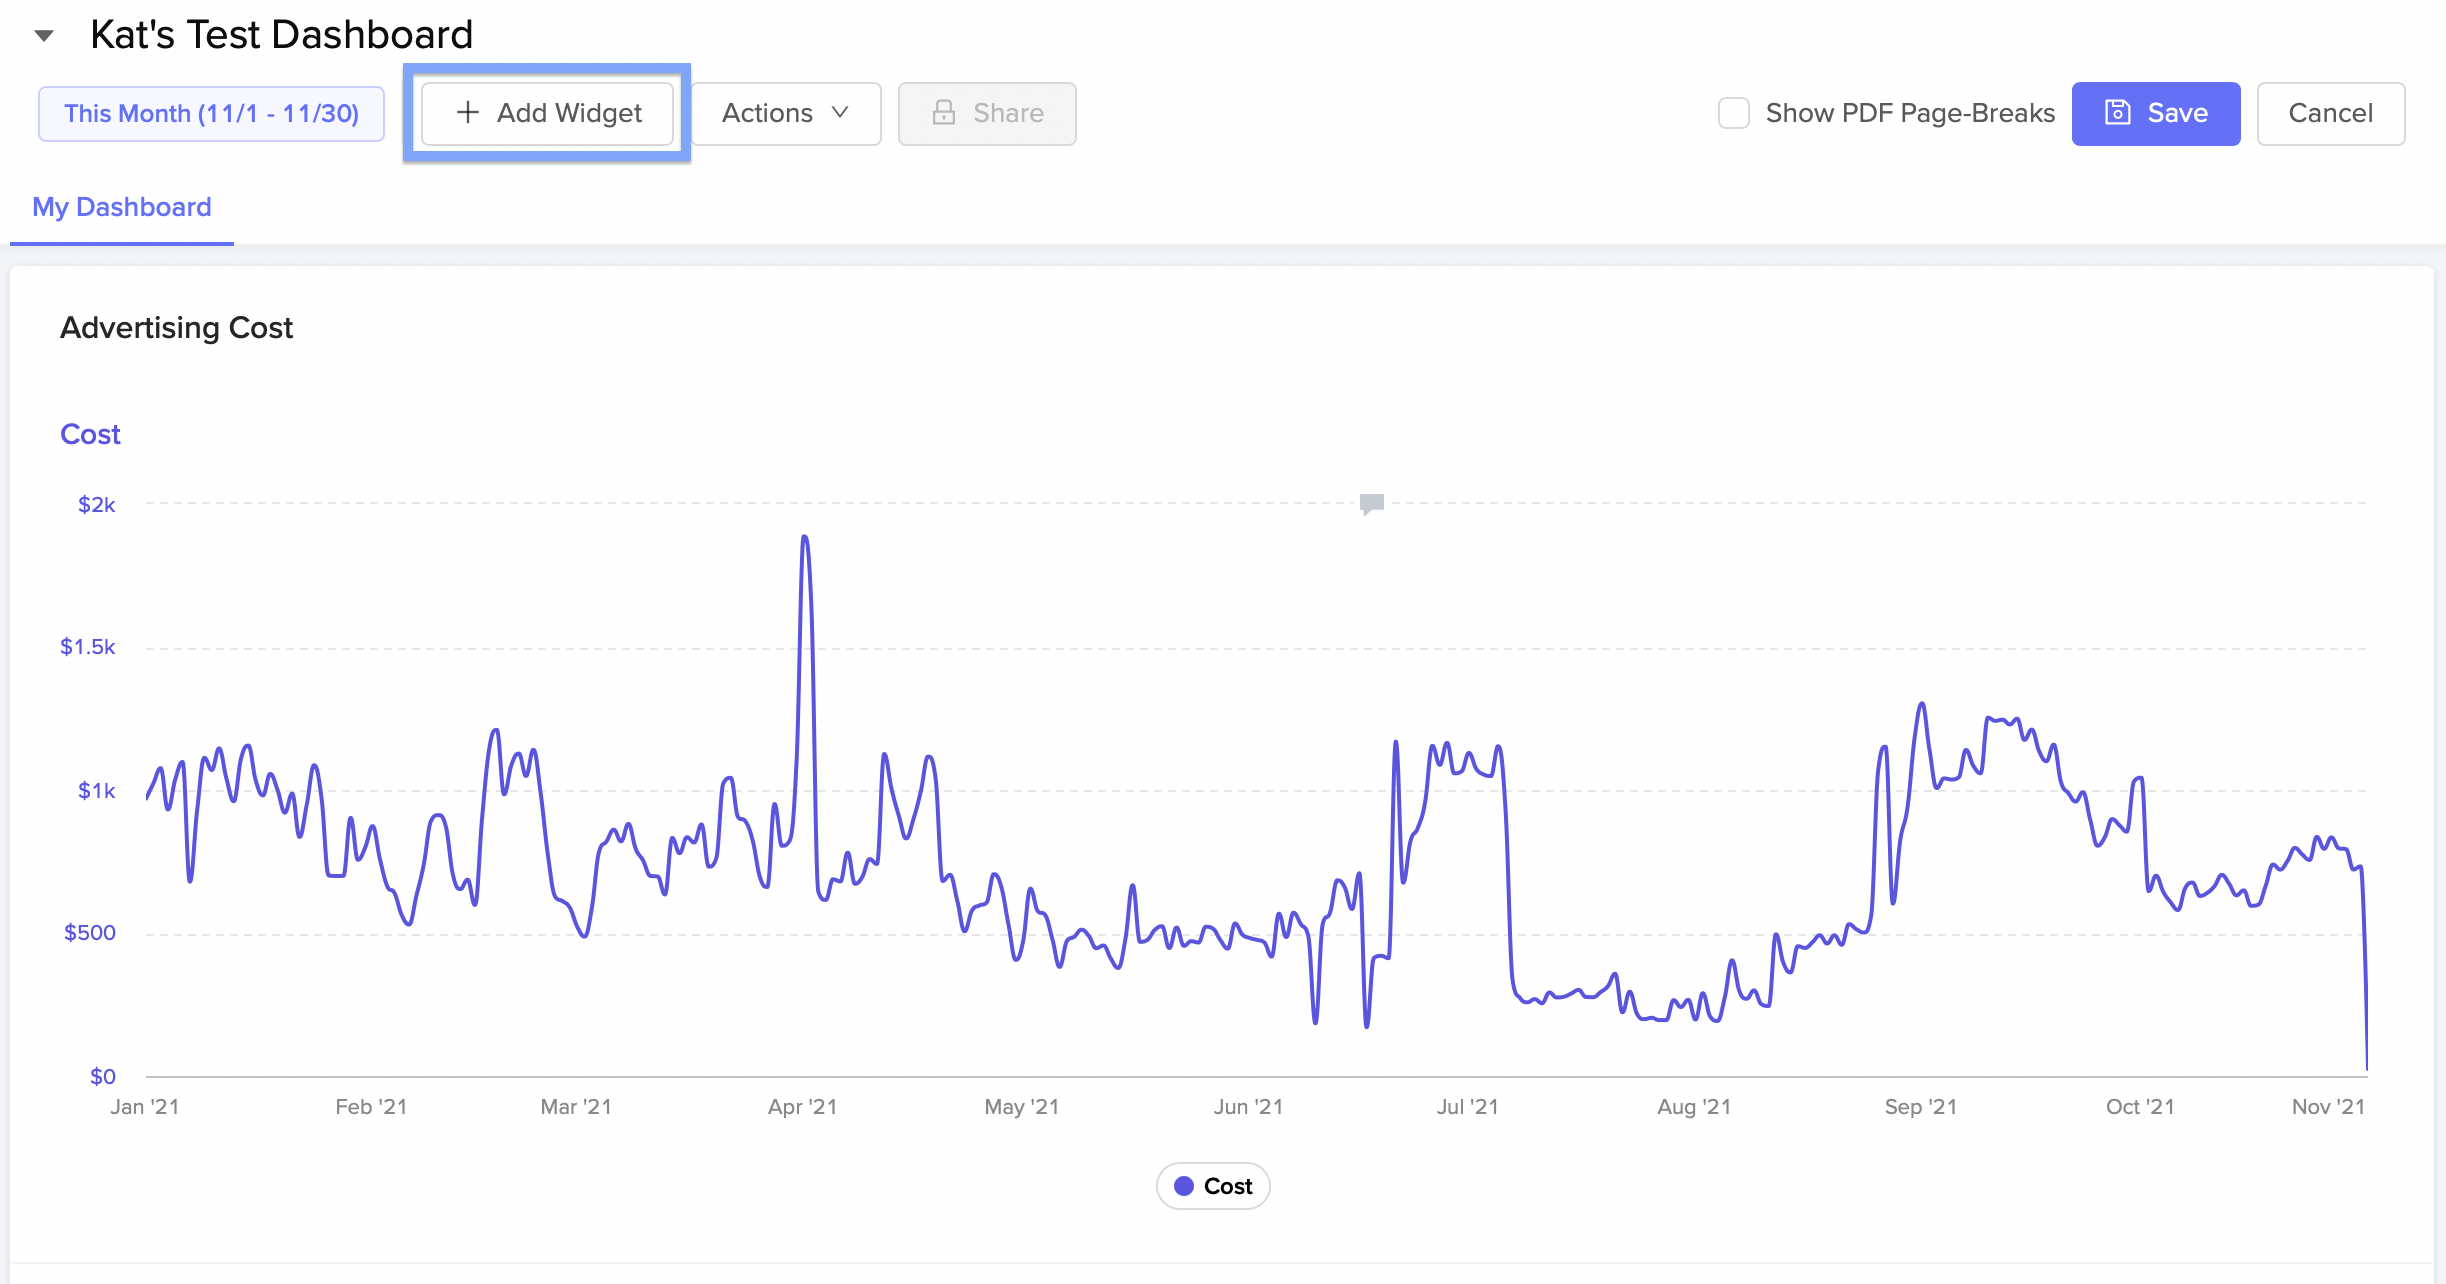
Click + Add Widget.
A pop-up window will appear asking you which type of widget you would like to create.

NOTE: Please see A Deep Dive Into Widgets for more information on what each widget type does.
Once you have chosen your widget, you will then be asked to select the data source/information you wish to view.

After selecting your data source, you will then configure the Widget by adding in the metrics you would like to view such as: choosing time data, deciding your chart type, etc.

Once you have configured your widget, click Submit.
Your created widget will then appear on your dashboard page.

Make sure to click Save, located at the top right corner of the page, to save your widget to your dashboard.

Once you have created your first widget, you can easily go back into your dashboard page and add more widgets by clicking on + Add Widget on the page itself or clicking on + Add Widget at the top of the page.
How to Invite Team Members
Learn how to invite new team members to your Downstream account with simple step-by-step instructions.
Inviting Team Members To Your Downstream
To Invite team members:
Select Profile at the top right corner of the page and then select Account.

Once you have been brought to the account page, select the Invitations tab. This tab shows you all the individuals you have invited to your Downstream account.This is also where you can add new members.
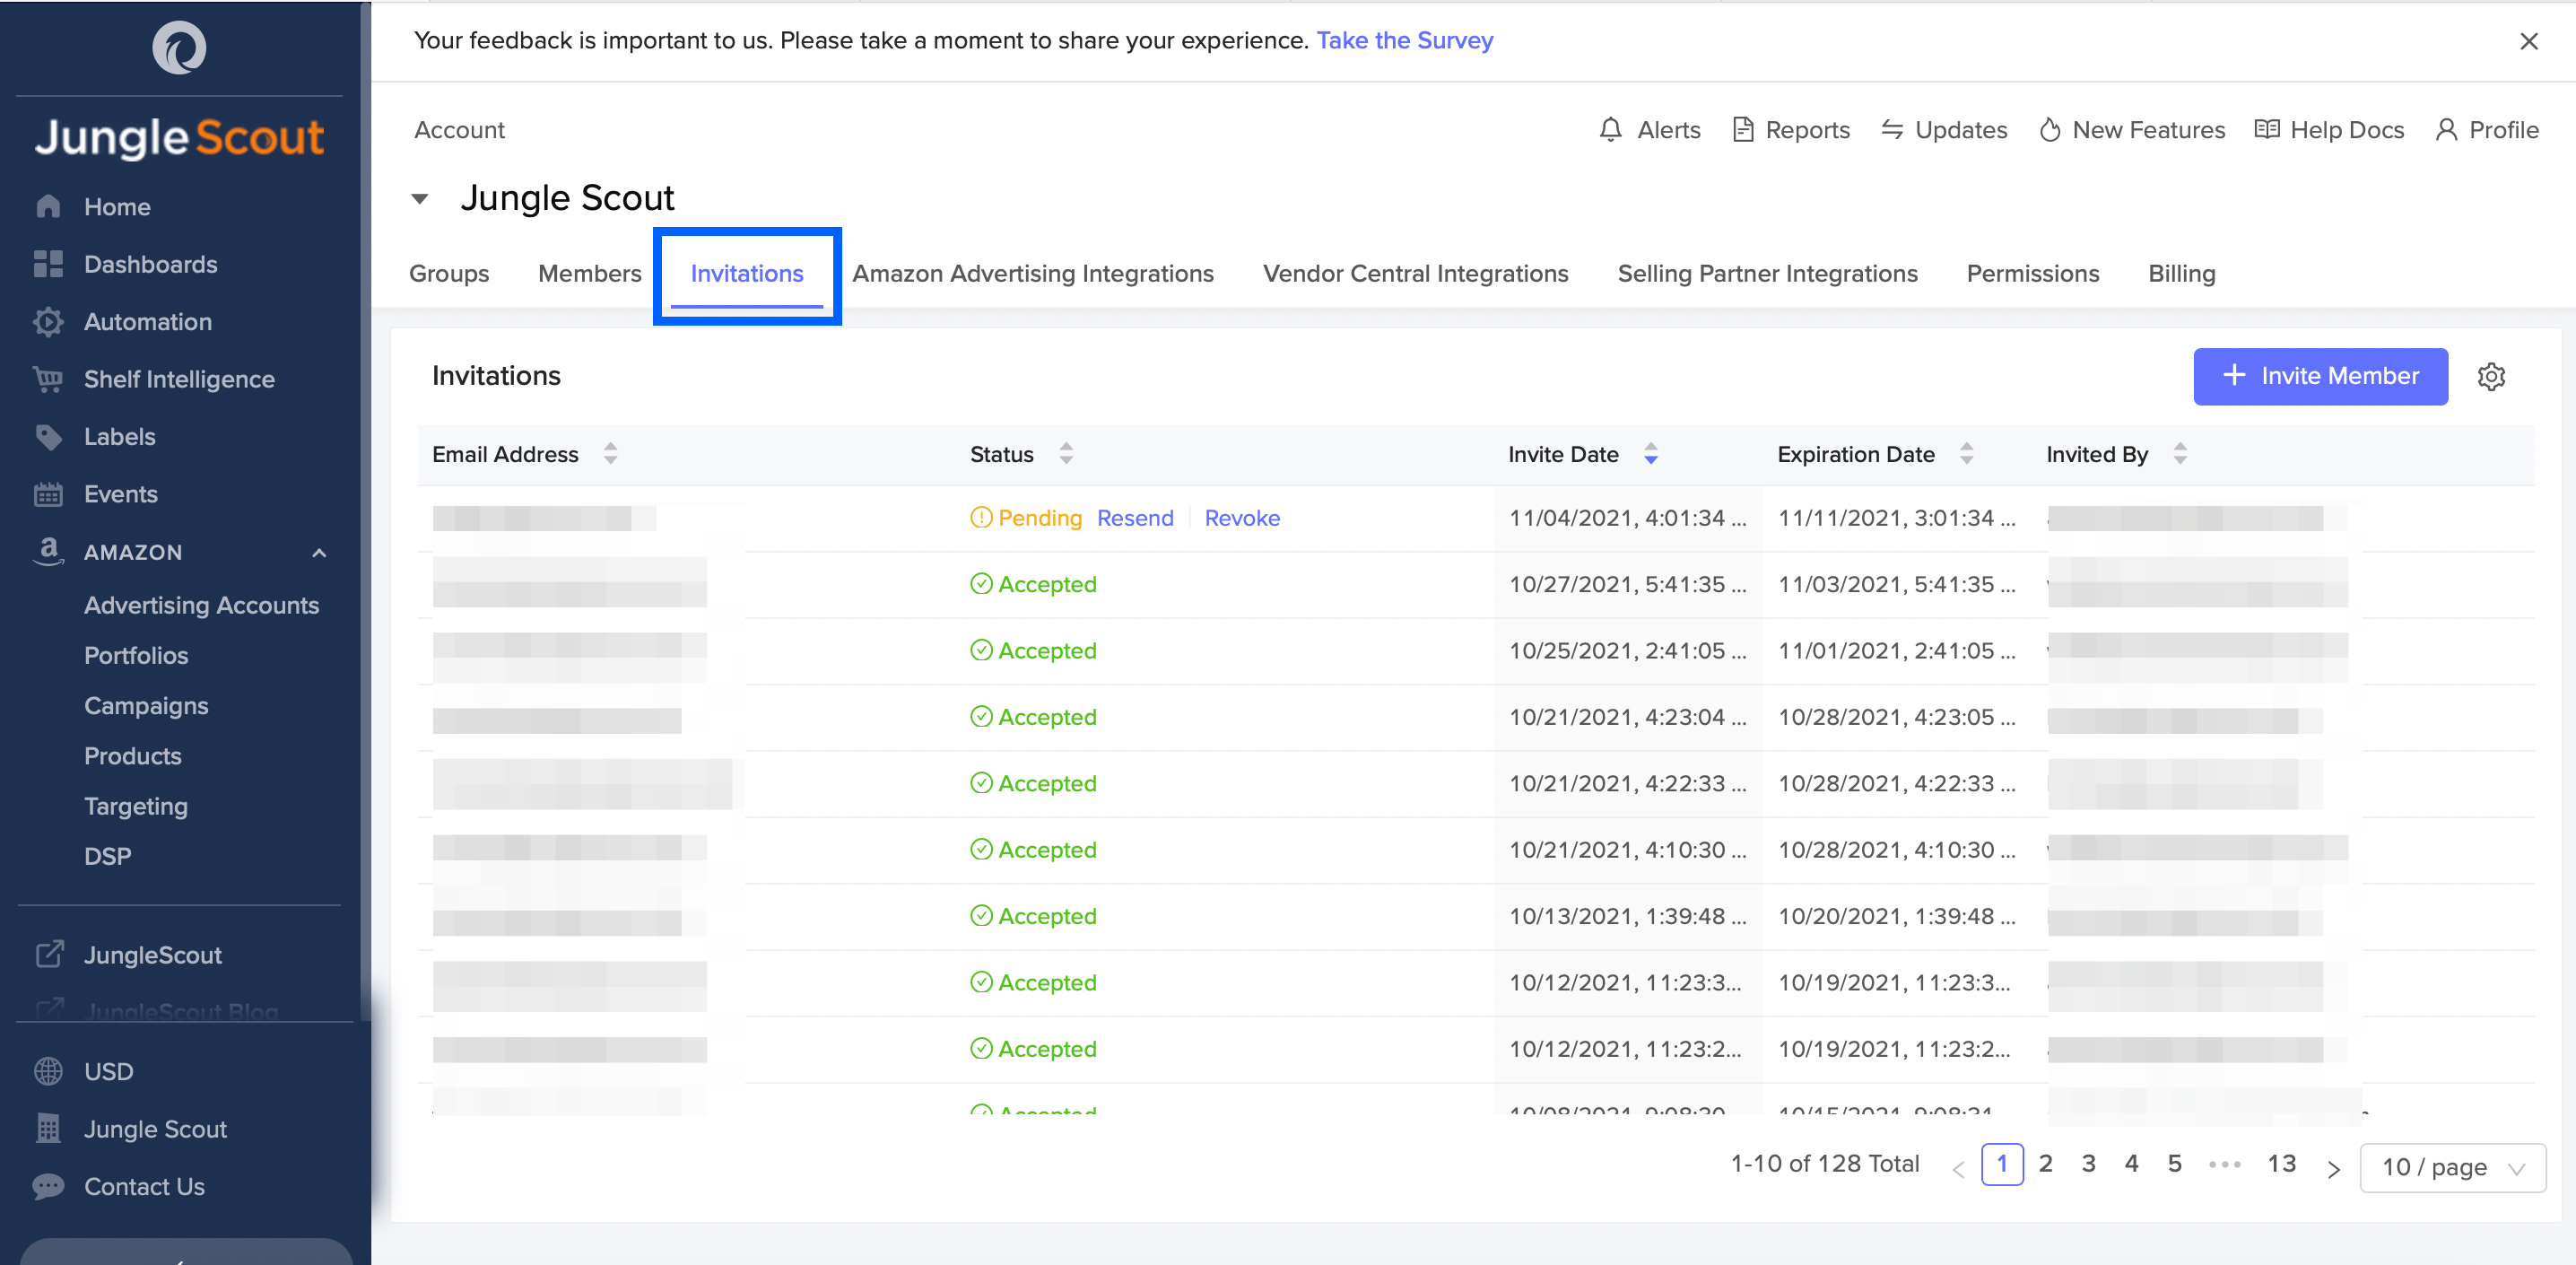
Click on + Invite Member.
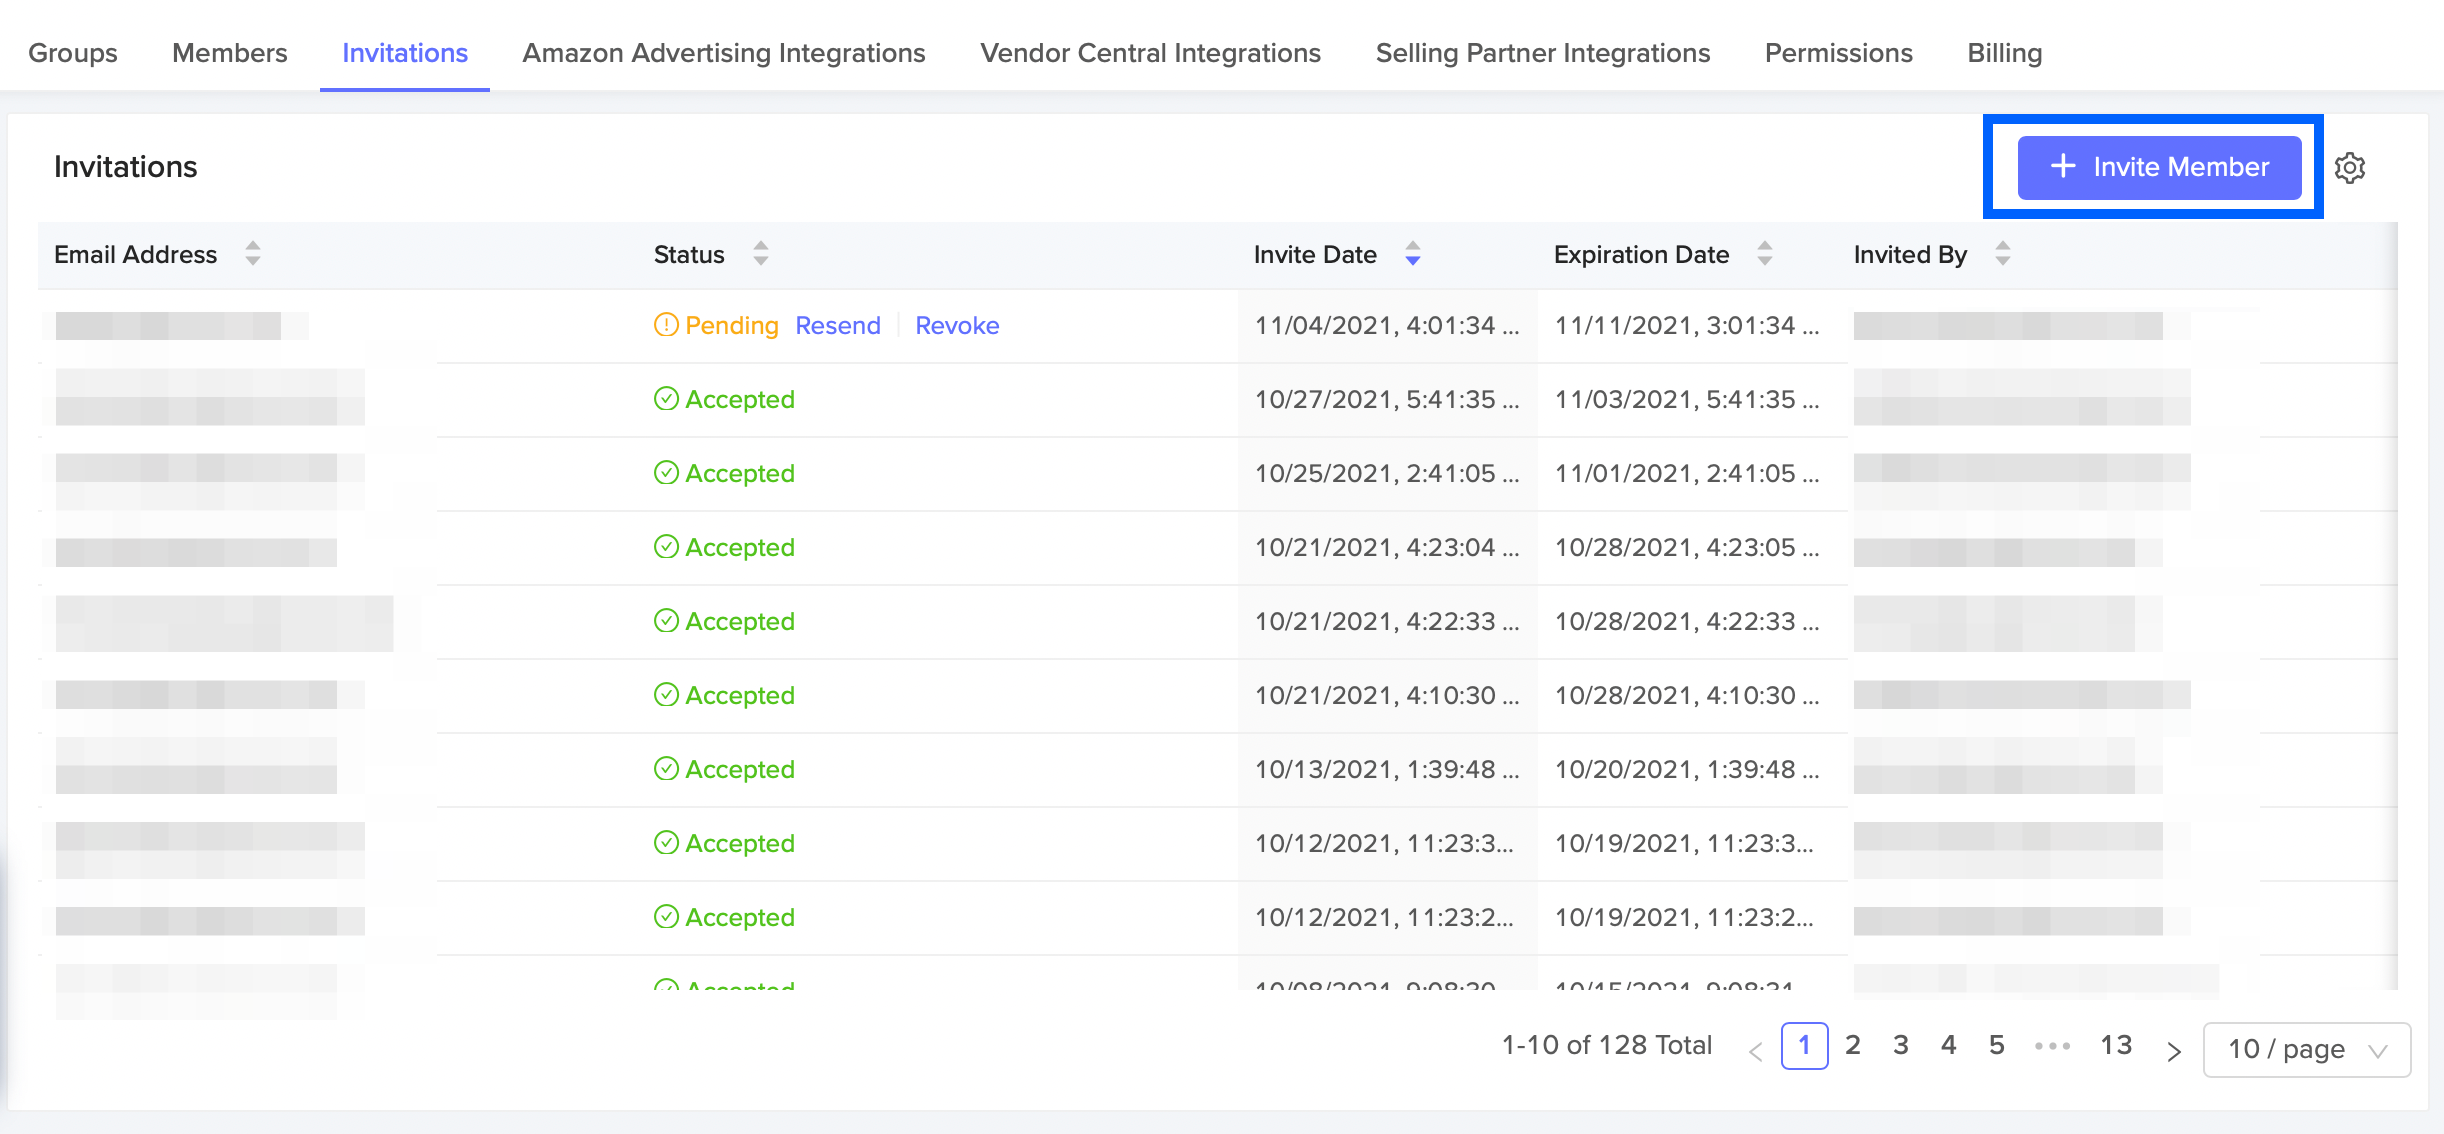
A pop-up window will appear asking for the email of the individual you would like to invite and which group you would like to add them too.

Click Send Invite. This will send an email invitation to the individual you invited.
Invitations Table
Through the invitations table you can easily see who you have invited and whether or not they have accepted the invitation. You can also customize the columns to include or exclude specific information.
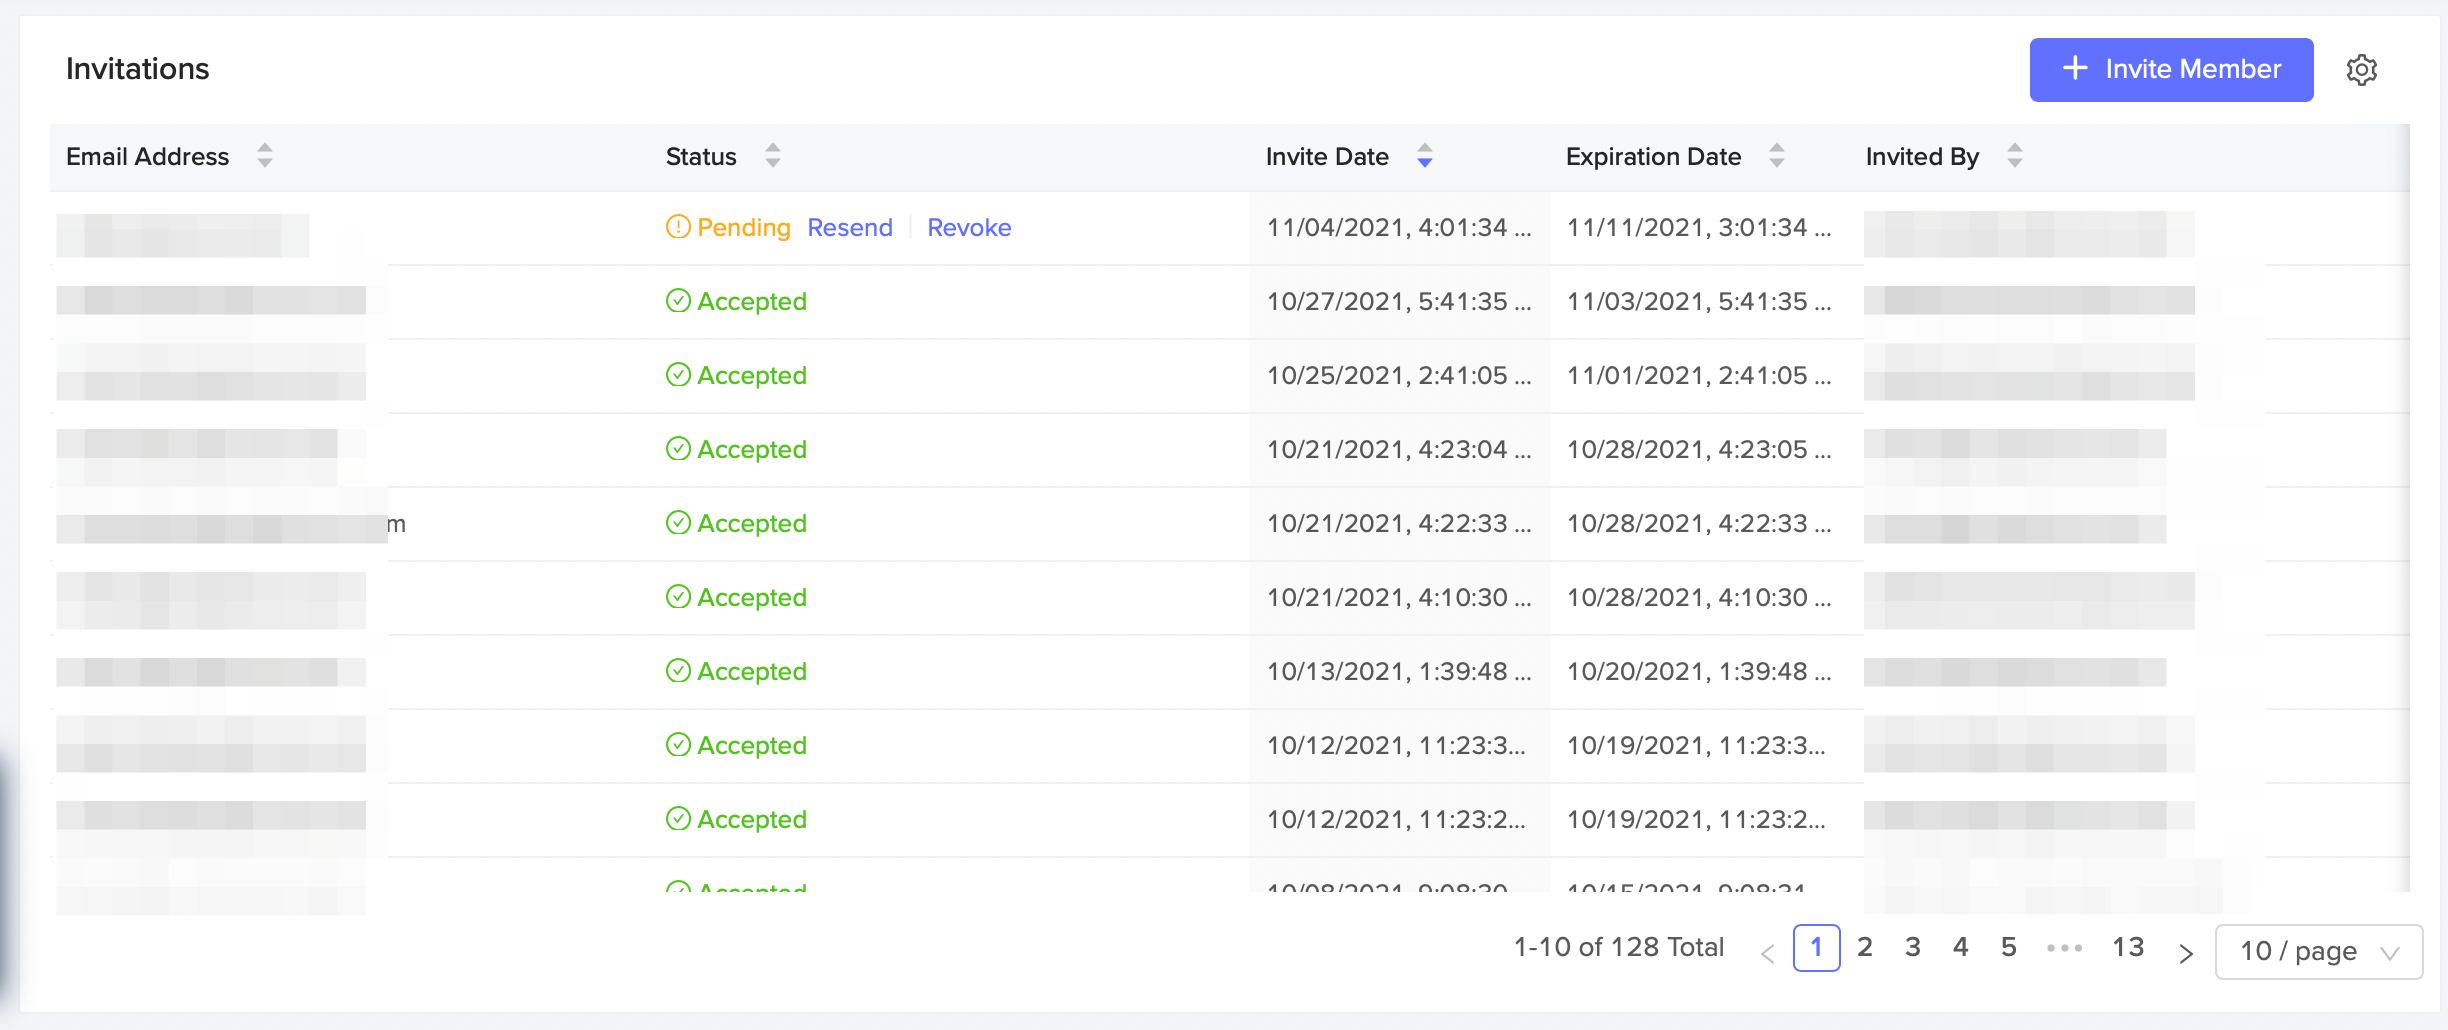
Email Address: This is the email address of the individual that you invited to your Downstream.
Status: This shows when the individual has accepted the invitation or not. If the invitation is still pending you are able to click Resend or if you wish to stop access you can click Revoke.
Invite Date: The date in which you sent the invitation
Expiration Date: The date in which access to Downstream will expire for the invited member.
Invited By: The person that invited the team member into Downstream.
Customizing the Invitation Table
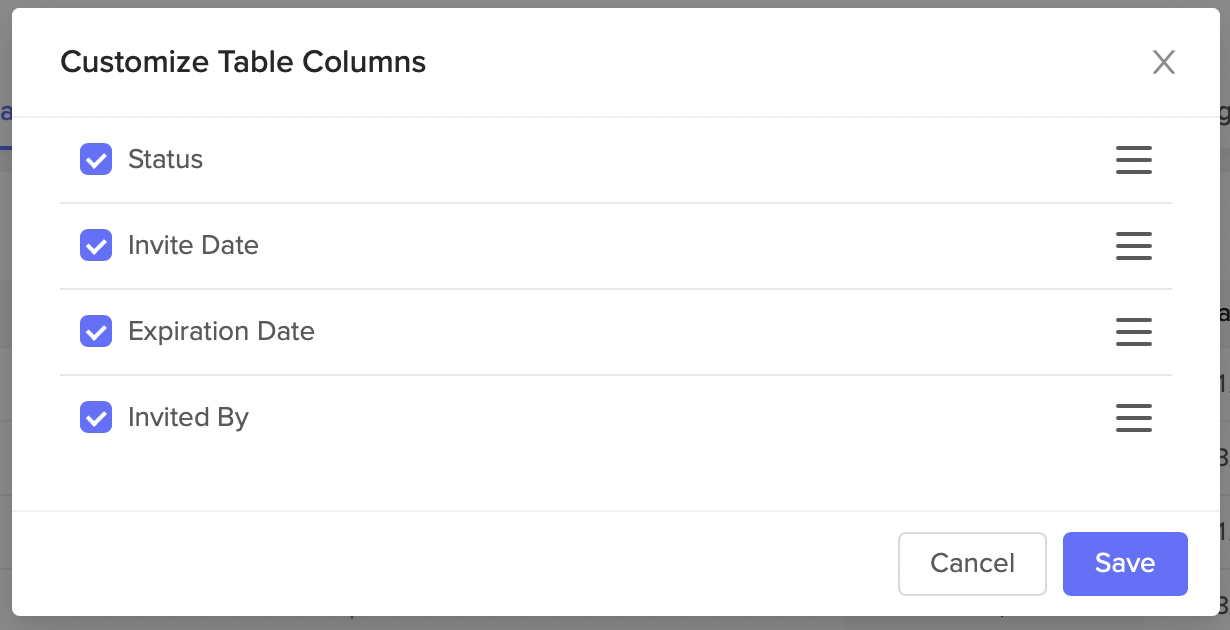
If you click the little gear icon , a pop-up window appears. This allows you to customize the columns that are included or removed from the table. Clicking on the horizontal lines gives you the option to organize the columns in the order you want them to appear on the table. Click Save for your changes to appear in the table.
How To Add Amazon Advertising Integration
In order to get Amazon advertising data flowing into Downstream you will first need to add an Amazon Advertising Integration. Follow the step-by-step instructions below to integrate your Amazon Advertising account with your Downstream account.
Adding An Advertising Integration
To add an advertising integration:
Select Profile at the top right corner of the page and then select Account.

Once you have been brought to the account page, select the Amazon Advertising Integrations tab.
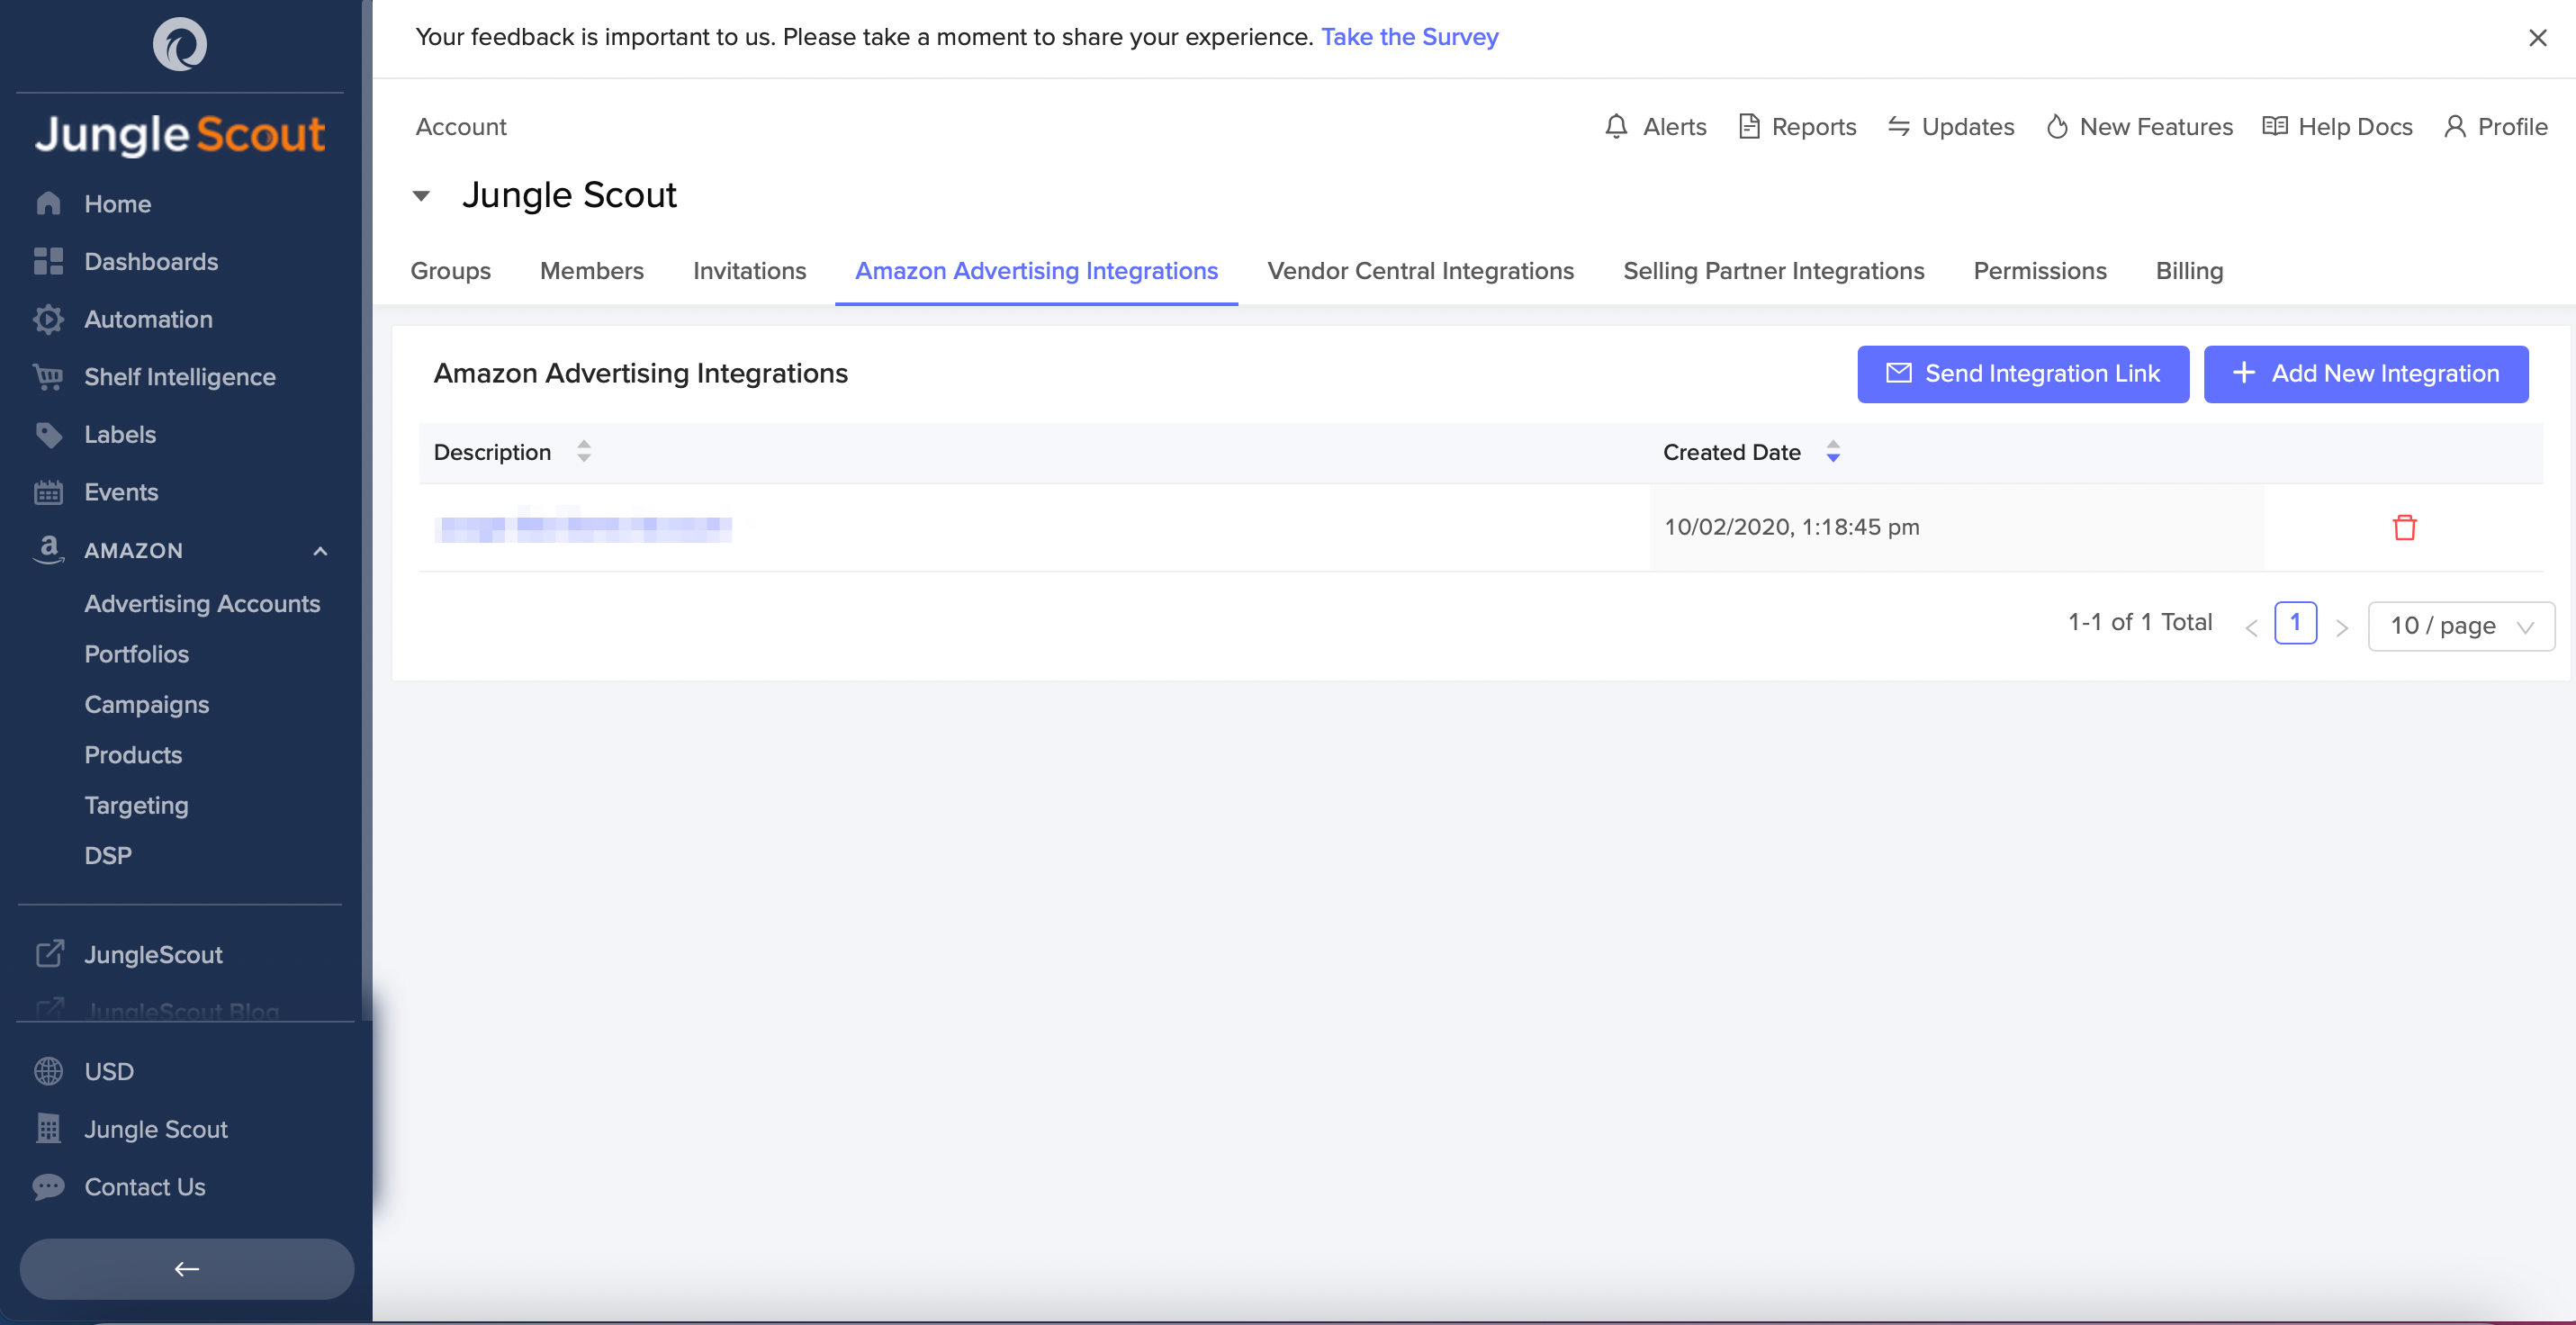
You will then have the option to + Add New Integration or Send Integration Link.

If you click + Add New Integration, a pop-up window will appear asking you to give a description. Enter in a description and then click + Create Integration. You will then be taken to Amazon's Authorization flow to set up the rest of the integration from there.

The Send Integration Link allows you to send an integration email to the Amazon account owner, or another Amazon user account with full Amazon advertising permissions. That user can then integrate the Amazon advertising account to Downstream, without having to create a Downstream account. Then click Send Invite.

Once you have added an advertising integration or sent an invite, it will take 3-6 hours for the data to be pulled into Downstream.
Amazon Advertising Integrations Table
You can easily see the advertising integrations you have added on the Amazon Advertising Integrations Table.

Description: This is a description of what advertising integration is. This is the information you entered when adding a new integration or sending an integration link to one of your team members.
Date Created: This is the date that the advertising integration was created.
Deleting an Advertising Integration
You can delete an advertising integration by clicking on the red trash can to the right of the table. A pop-up message will appear confirming that you wish to delete the integration. Please note, this action is permanent. Once you click Delete you can not get the integration back.

How to Add Selling Partner Integrations
Integrating your Seller Central or Vendor Central account is quick and easy and gives Downstream secure access to analyze your organic sales data.
Adding Selling Partner Integration
To add selling partner integration:
Select Profile at the top right corner of the page and then select Account.

Once you are in the account page, select the Selling Partners Integrations tab.

You will then have the option to + Add New Integration or Send Integration Link.

If you click + Add New Integration, a pop-up window will appear asking you to give a description. Enter in the integration type (Vendor or Seller type), the country, and a description and then click + Create Integration. You will then be taken to Amazon's Authorization flow to set up the rest of the integration from there.

The Send Integration Link allows you to send an integration email to the Amazon account owner, or another Amazon user account. That user can then add an integration to Downstream, without creating a Downstream account. Add in your details and then click Send Invite.

5. Integrations must be authorized by users with admin permissions. 6. Once you have added an integration or sent an invite, it will take 24-48 hours for the data to be pulled into Downstream.
Selling Partner Integration Table
You can easily see the seller and vendor integrations you have added on the Selling Partner Integrations Table.

Description: This is the information you entered when adding a new integration or sending an integration link to one of your team members.
Integration Type: This is the integration type you chose. There are two types of integration: Vendor Central and Seller Central. Vendor Central is the web interface used by manufacturers and distributors. Seller Central is the web interface used by brands and merchants to market and sell their products directly to Amazon's customers.
Status: Indicates the status of the integration.
Created Date: Indicates the date and time an integration was created.
How to Create and Add Labels in Downstream
Labels add a custom, sortable dimension to your Advertising Accounts, Portfolios, Campaigns, Products, Targeting, or DSP. Learn how to add your labels below!
How to Navigate to Labels
From the left-hand navigation panel, select Labels.

How to Create a Label
There are two ways you can create a new label.
Creating a label from the Labels page.
Create a label from another page (Advertising Accounts, Portfolios, Campaigns, Products, Targeting, or DSP.)
Create a Label from the Labels page
To create a label within Labels:
Navigate to the Labels page.
Click on + Add New Label.

A pop-up window will appear asking you to give your label a name and to choose the color of your label.

Click + Add Label. This will add the label, you created, into the Labels table.
Create a Label from another page
To create a label from another page:
Navigate to Advertising Accounts, Portfolios, Campaigns, Products, Targeting, or DSP.

Click on one of your created pages. For example, in Campaigns click on one of your portfolios. Your Campaign will open.
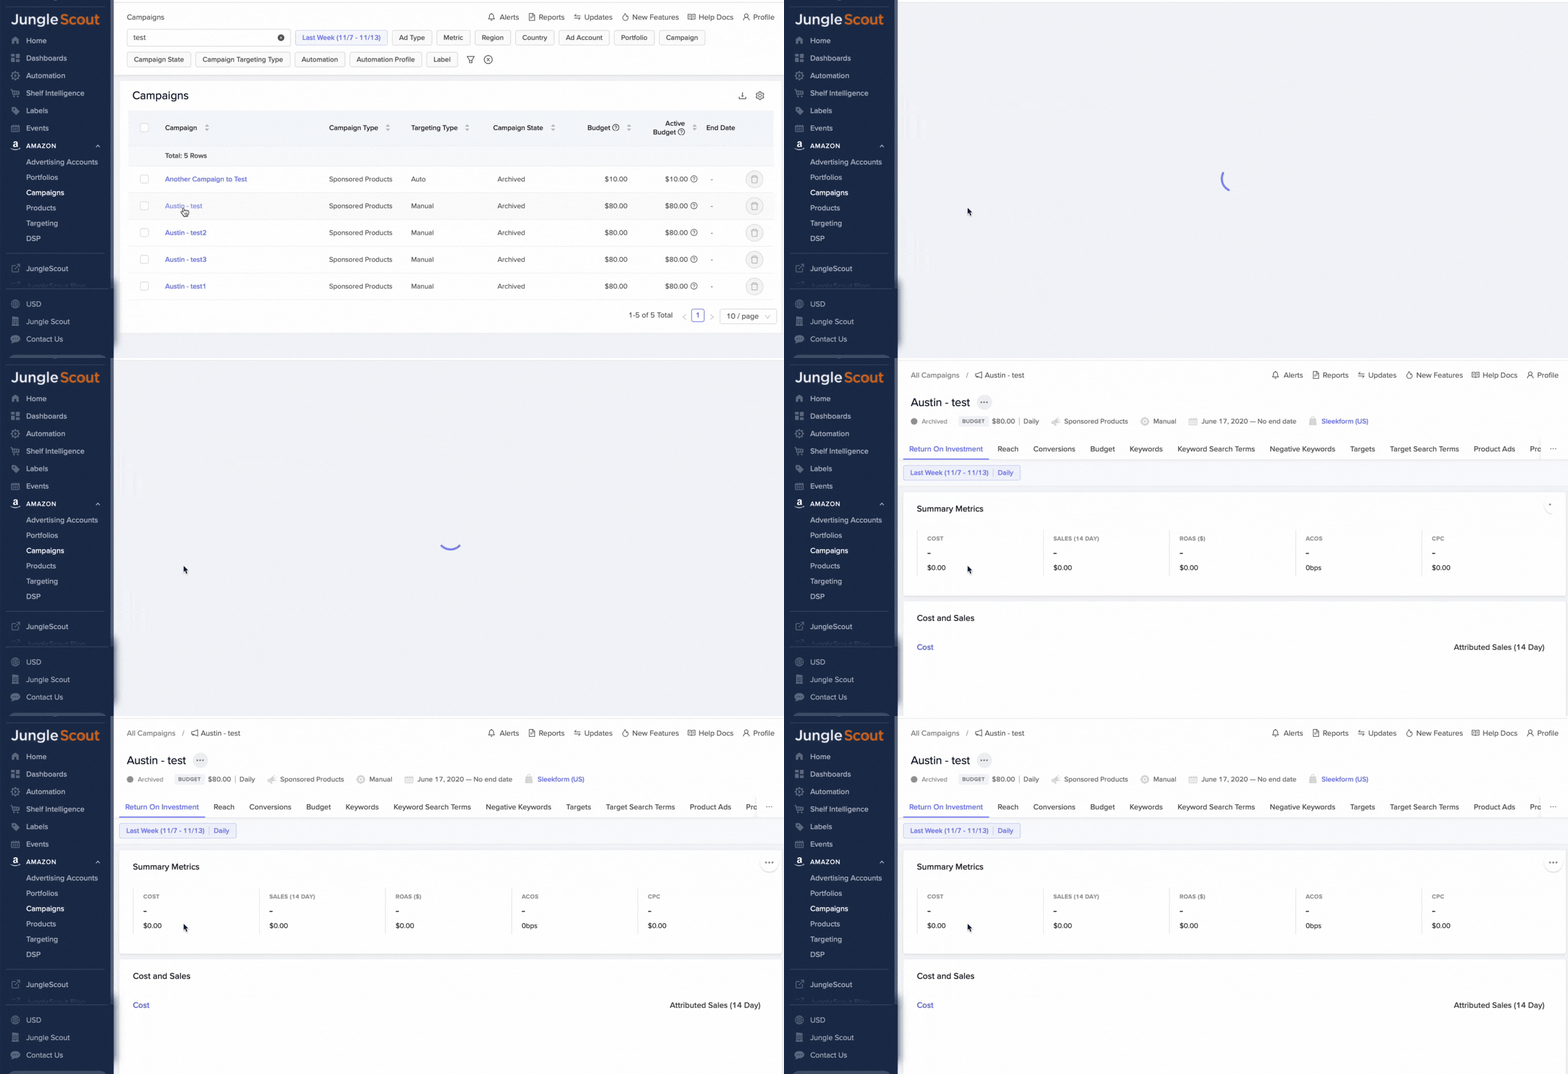
Click on the ellipses icon located next to the page name. Then click on Add Labels in the drop-down menu. (Note: You will find this icon located at the top of the other pages you created as well.)

A pop-up window will appear. Click Create New Label.

Another pop-up window will appear asking you to give your label a name and to choose the color of your label.
Click + Add Label. This will add the label you created into the Labels table.
How to Add a Label
You can add labels to pages such as Advertising Accounts, Portfolio, Campaigns, Products, Targeting, or DSP.
To add a label to a page:
Navigate to Advertising Accounts, Portfolio, Campaigns, Products, Targeting, or DSP.

Click on one of your created pages. For example, click one of your campaigns in the Campaigns tab. Your campaign will open.

Click on the ellipses icon located next to the page name. Then click on Add Labels in the drop-down menu. (Note: You will find this icon located at the top of the other pages you created as well.)

A pop-up window will appear. Click within the box to search for your created labels.

Once you have selected all labels you wish to apply to your page, click Add.
The labels you added to the page will appear next to the page name.

Labels Table
You can easily see the labels you have created on the Labels Table.
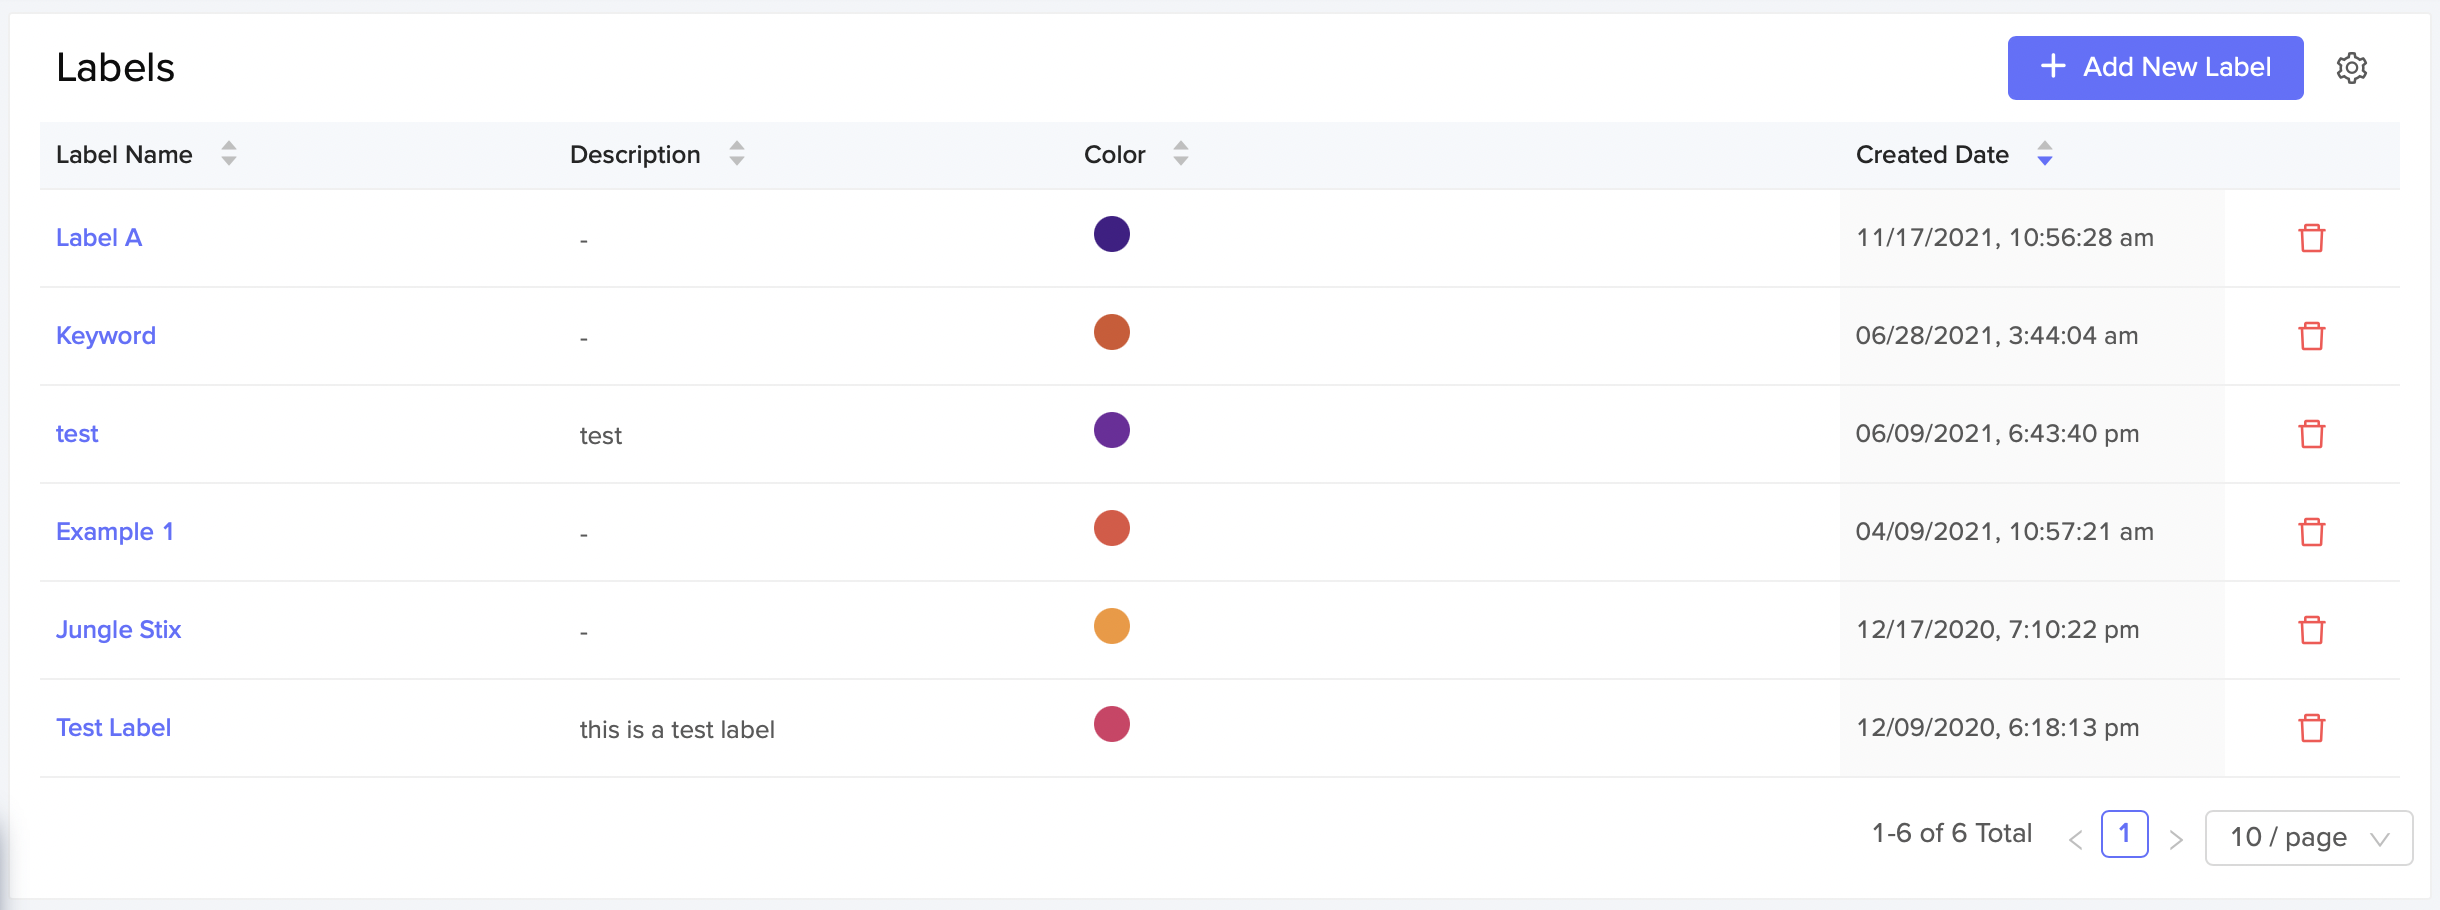
Label Name: This is the name of your label.
Description: This is a description of what the label is. This is the information you entered when creating a label.
Color: This is the label color you chose when creating your label to distinguish it from other labels.
Created Date: This indicates the date and time that the label was created.
Customizing the Labels Table
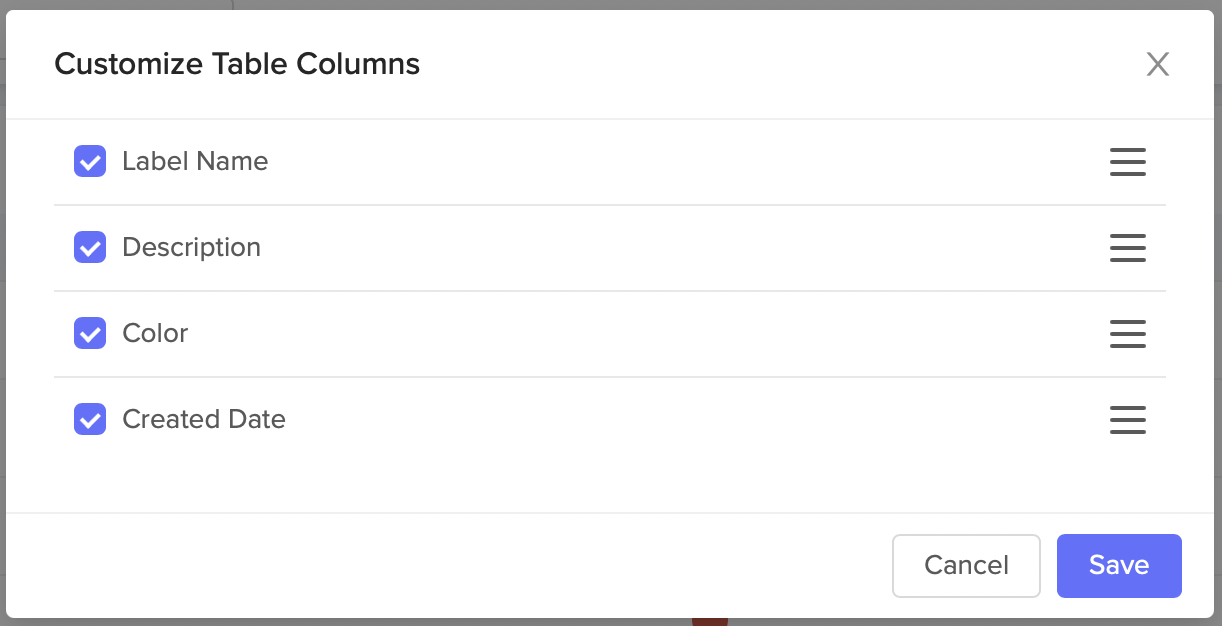
If you click the little gear icon , a pop-up window appears. This allows you to customize the columns that are included or removed from the table. Clicking on the horizontal lines gives you the option to organize the columns in the order you want them to appear on the table. Click Save for your changes to appear in the table.
Deleting a Label
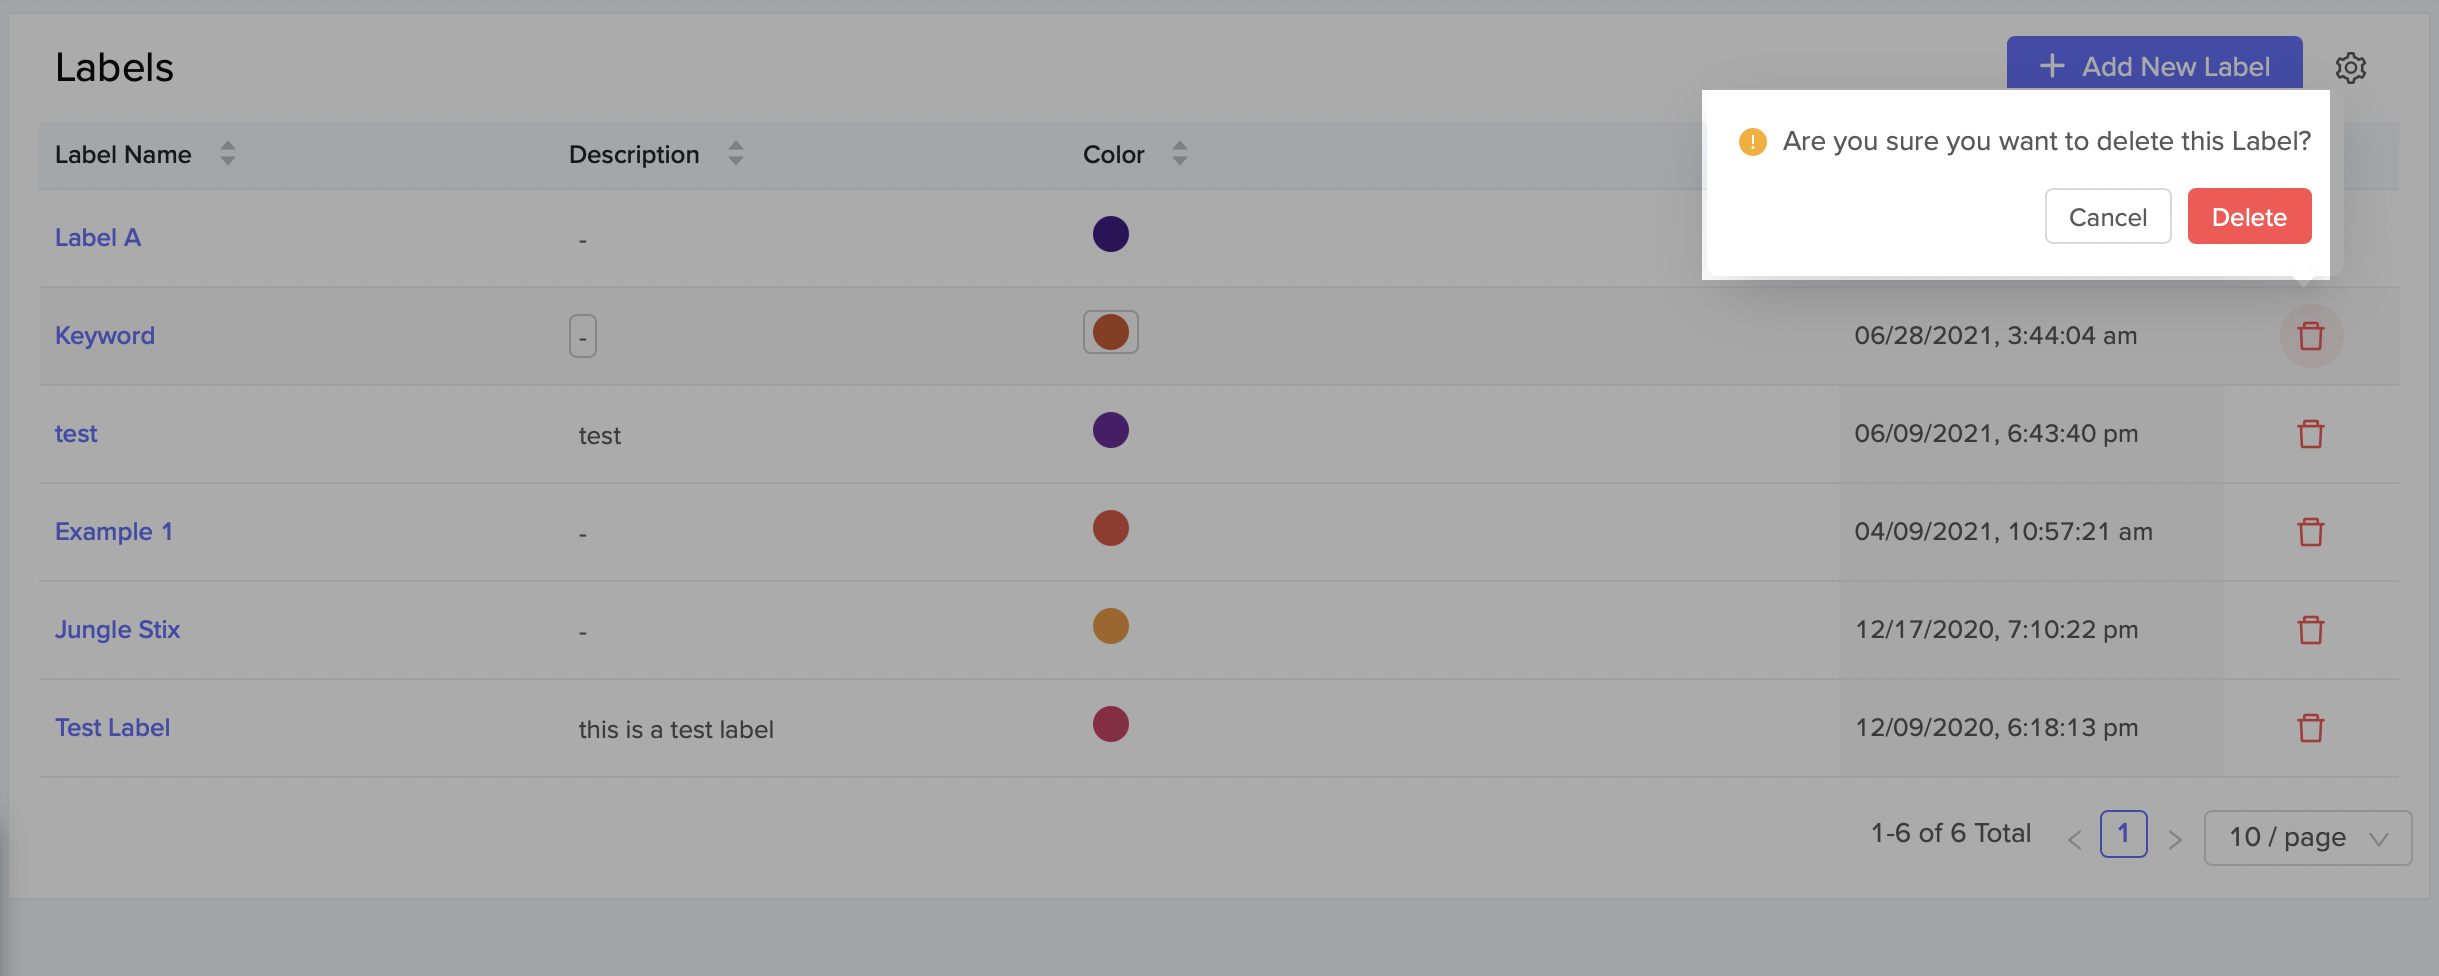
You can delete a label by clicking on the red trash can to the right of the table. A pop-up message will appear confirming that you wish to delete the label. Please note, this action is permanent. Once you click Delete you can not get the label back.
Turn on Automation
Learn more about Downstream's advertising automations: https://docs.downstreamimpact.com/categories/automation


